Additional options allow you to change the appearance and behavior of the application, and are specified in the configuration file /etc/microimpuls/portal/client.js.
The following options are available for the impuls interface.
Logic of work
Authorization regime
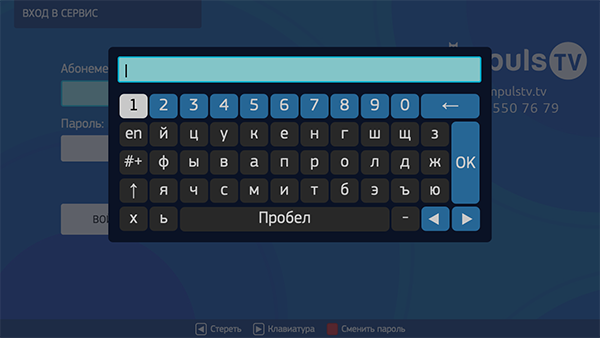
Option name: auth_mode, data type: string.
Possible values:
- password - by login and password (by default).
- device_uid A unique device identifier (usually a MAC address) or IP address. In case of unsuccessful authorization, the subscriber will be offered authorization by login and password.
- device_uid_wo_fallback - the same as device_uid, but without processing some situations of unsuccessful authorization and transition to login and password authorization.
Example:
var CLIENT_SETTINGS = {
///...
'auth_mode': 'password'
};
Showing the welcome message
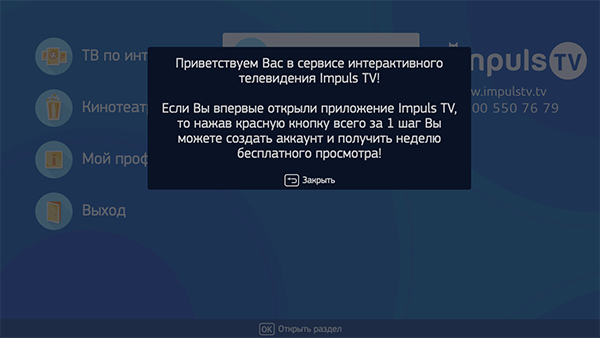
Option name: show_welcome_message, data type: bool.
Possible values:
- true - message showing.
- falsely the message is not displayed (by default).
Example:
var CLIENT_SETTINGS = {
///...
'show_welcome_message': false
};
Text of the welcome message
Option name: welcome _message, data type: string.
The text of the welcome message at the first launch of the application. No default.
Example:
var CLIENT_SETTINGS = {
///...
'welcome_message': Welcome to the Localhost Telecom interactive TV service!
};
Contact Technical Support Service
Option name: support_infodata type: string
Information on how to contact technical support. It is displayed on all the main template pages in the lower right corner.
var CLIENT_SETTINGS = {
///...
'support_info': "8.8 million 00 00"
};
The possibility of registration via SMS
Option name: registration_available, data type: bool.
Possible values:
- true The registration button is displayed via SMS.
- falsely it is not displayed (by default).
To be able to register via SMS, you need to properly configure integration with the SMS gateway on the Smarty server side.
Example:
var CLIENT_SETTINGS = {
///...
'registration_available': false
};

Mobile phone number mask in the registration screen
Option name: registration_phone_mask, data type: string.
By default +7 ??? ??? ?? ??.
The mask uses a special symbol ?, instead of which the input value will be substituted, the remaining characters will be displayed as is.
Example:
var CLIENT_SETTINGS = {
///...
'registration_phone_mask': '+7??????????
};
Auto-registration at the first launch
Option name: allow_autoregistration, data type: bool.
Possible values:
- true At the first launch of the application, a new account is automatically registered and the device is linked via UID.
- falsely auto registration is disabled (by default).
Example:
var CLIENT_SETTINGS = {
///...
'allow_autoregistration': false
};
Message after autoregistration
Option name: autoregistration_message, data type: string.
Allows you to specify the text of the message, which is displayed after successful autoregistration. No default.
Example:
var CLIENT_SETTINGS = {
///...
'autoregistration_message': You have been activated 7 days of free Localhost Telecom TV viewing! We wish you a pleasant viewing!
};
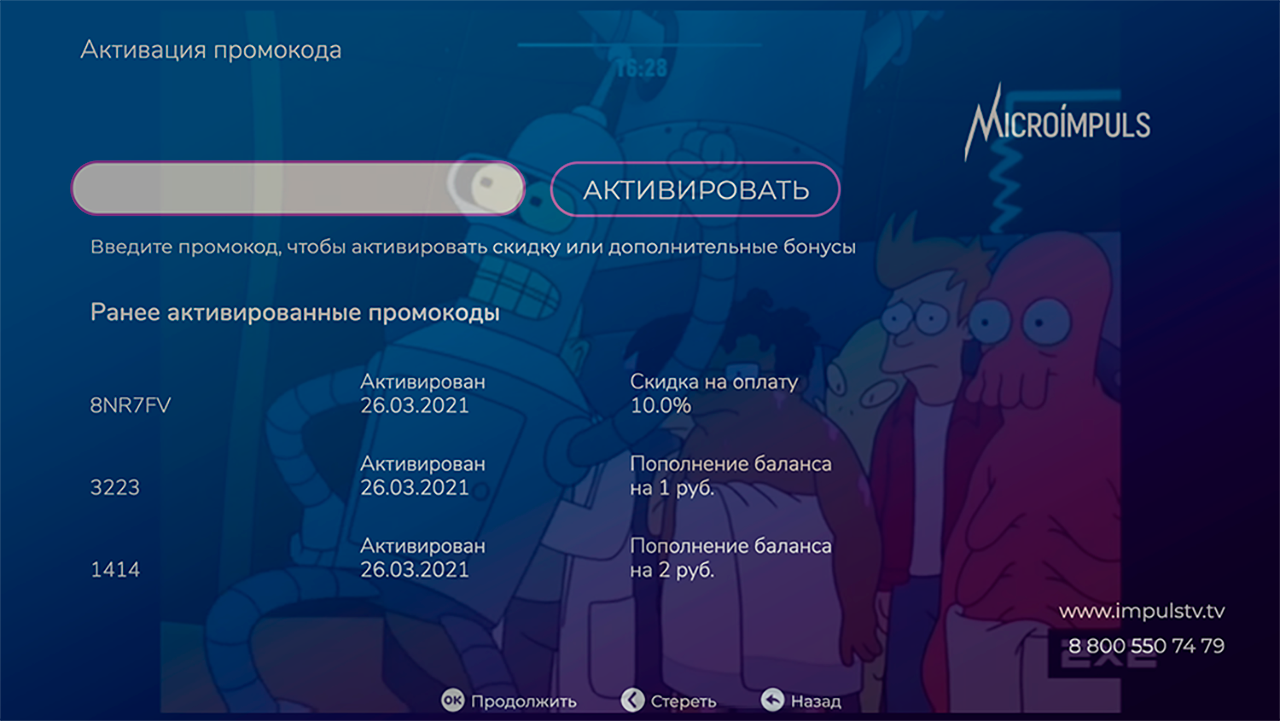
Showing the item "Activate promo code"
Option name: enable_promo_activation, data type: bool.
Shows the menu item "My profile" -> "Activate promo code". The default is false.
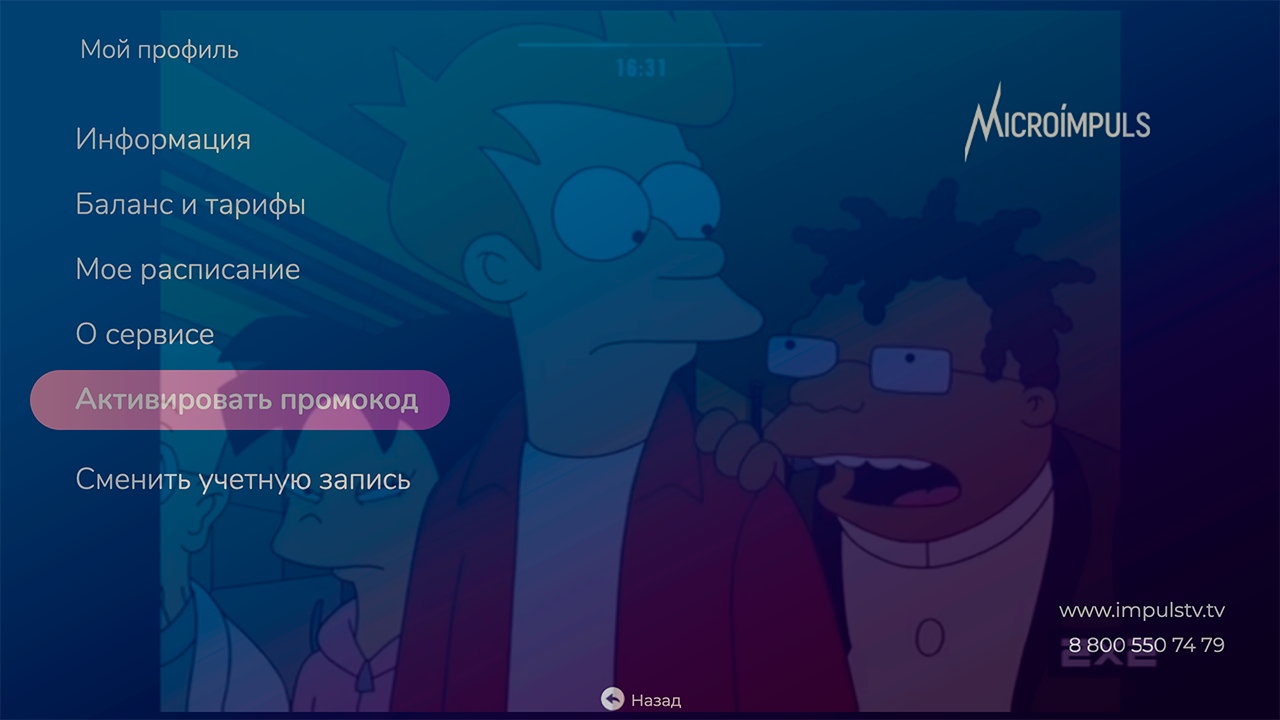
Example:
var CLIENT_SETTINGS = {
///...
'enable_promo_activation': true
};
Text of the termination notice
Option name: account_renewal_message, data type: string.
Allows you to set the text of the message, which is displayed to the user at the end of his subscription. It usually specifies how to renew your subscription. By default is not set - a message sewn into the application is shown.
Example:
var CLIENT_SETTINGS = {
///...
'account_renewal_message': The paid viewing period has expired! Did you like TV? Refill your account in the "My profile" section of the application or in your personal account on the site example.tv and look further!
};
The ability to enter symbols in the login
Option name: is_letter_in_login, data type: bool.
Possible values:
- true in the login you can enter numbers and letters.
- falsely only numbers can be entered in the login (by default).
Example:
var CLIENT_SETTINGS = {
///...
'is_letter_in_login': false
};
The ability to enter characters in the password
Option name: is_letter_in_password, data type: bool.
Possible values:
- true numbers and letters can be entered in the password.
- falsely only numbers can be entered in the password (by default).
Example:
var CLIENT_SETTINGS = {
///...
'is_letters_in_password': false
};
Time to show reminder of the beginning transfer
Option name: default_notification_time, data type: int.
Possible values:
- 0 reminder will be shown 5 minutes before the transfer (by default).
- 1 - 15 minutes.
- 2 - 30 minutes.
- 3 - 1 hour.
- 4 - 2 hours.
Reminders are set by the subscriber for future broadcasts from the TV program screen.
Example:
var CLIENT_SETTINGS = {
///...
'default_notification_time': 0
};
Additional settings menu items
Option name: settings_menu_custom_items, data type: array.
Allows you to add additional items to the settings screen. Processing values and actions depending on the added settings is programmed in the settings file client.js through the event mechanism of the portal. By default [].
An example of adding an HDMI Event Catch Control setting:
Screen payment settings
Type of Merchant for Screen Payment
Option name: merchant_type, data type: string.
Possible values:
- empty value – the merchant installed on the server by default (by default) will be used.
- w1 - Wallet One merchant.
- paymaster - Merchant Paymaster.
- pay - Merchant Payture.
Example:
var CLIENT_SETTINGS = {
///...
'merchant_type': "payture"
};
Payment page template on the Merchant side
Option name: template_of_payment_page, data type: string.
The external payment page template that you need to use. Possible values are requested from the respective payment partner, as templates are laid out separately for each company on the payment gateway side. By default, it is not set – a standard template will be used.
This mechanism is used to open an adapted form of payment on each device, for example, a separate form for Smart TV, designed to manage the remote, a separate form of payment for mobile devices with support for adaptive layout, and a separate browser version.
Example:
var CLIENT_SETTINGS = {
///...
'template_of_payment_page': "Payture"
};
Acceptance of an offer before payment
Option name: show_offer_accept, data type: bool.
Possible values:
- true - before payment, pop-up will be shown with the text of the offer and the need to accept it.
- falsely - disabled (by default).
The offer is automatically considered a zero-order legal document in Smarty. If there are no documents or a zero order document does not require acceptance, then popp will not be shown.
Example:
var CLIENT_SETTINGS = {
///...
'show_offer_accept': false
};
Integration with MVision
Frequency of sending system metrics to MVision
Option name: monitoring_interval_sys_info, data type: int.
It allows you to set the frequency (in milliseconds) at which the portal will send system metrics from the device to the Microimpuls MVision server. Sending metrics should also be enabled in the device settings in the Smarty Administrator Panel. By default 300000.
Example:
var CLIENT_SETTINGS = {
///...
'monitoring_interval_sys_info': 300,000
};
Frequency of sending performance metrics and errors in MVision
Option name: monitoring_interval_metrics, data type: int.
It allows you to set the frequency (in milliseconds) at which the portal will send performance and video quality metrics from the device to the Microimpuls MVision server. Sending metrics should also be enabled in the device settings in the Smarty Administrator Panel. By default 15000.
Example:
var CLIENT_SETTINGS = {
///...
'monitoring_interval_metrics': 15,000
};
MVision server address
Option name: monitoring_server_url, data type: string.
Allows you to set the MVision server address to send statistics. If MVision and Smarty are on different servers. If the value of the option is not specified, then the statistics are sent to the main Smarty server. No default.
Example:
var CLIENT_SETTINGS = {
  // …
  'monitoring_server_url': "http://mvision.example.com"
};
Management logic
Volume control with remote arrows
Option name: change_volume_on_left_right_arrows_keys, data type: bool.
Possible values:
- true turn on volume control using remote arrows in addition to the usual volume buttons.
- falsely - not to include (by default).
Example:
var CLIENT_SETTINGS = {
///...
'change_volume_on_left_right_arrows_keys': false
};
Compatibility Mode with Smart TV Platform Guidelines
Option name: samsung_guidelines_compatibility_mode, data type: bool.
Possible values:
- true Enable compatibility mode with the recommendations of Smart TV platforms.
- falsely - disable (by default).
Compatibility mode affects the logic of the portal behavior, including the assignment of remote buttons, and is necessary to include some special restrictions for easier publication in the Samsung and LG app stores.
Example:
var CLIENT_SETTINGS = {
///...
'samsung_guidelines_compatibility_mode': false
};
Application navigation mode
Option name: navigation_mode, data type: string.
Possible values:
- normal normal navigation (by default).
- horizontal - transition between screens arrows remote.
Example:
var CLIENT_SETTINGS = {
///...
'navigation_mode': "normal"
};
Open the infobar by pressing the OK button
Option name: open_infobar_on_ok_key, data type: bool.
Possible values:
- true In full-screen viewing by pressing the OK button, the infobar will open (if it was hidden).
- falsely In full-screen viewing, at the click of the OK button, a list of channels/transmissions/movies will open depending on the type of content being played (by default).
Example:
var CLIENT_SETTINGS = {
///...
'open_infobar_on_ok_key': false
};
Clocking the transition by day in the TV screen
Option name: loop_epg_screen_menu_on_up_down_keys, data type: bool.
Possible values:
- true In the EPG screen, when you reach the beginning of the list and move up, there will be a transition to the end of the current day, and when you go down from the end – to the beginning of the list.
- falsely - the transition described above will not be made, the list of transmissions will be scrolled within the selected day (by default).
Example:
var CLIENT_SETTINGS = {
///...
'loop_epg_screen_menu_on_up_down_keys': false
};
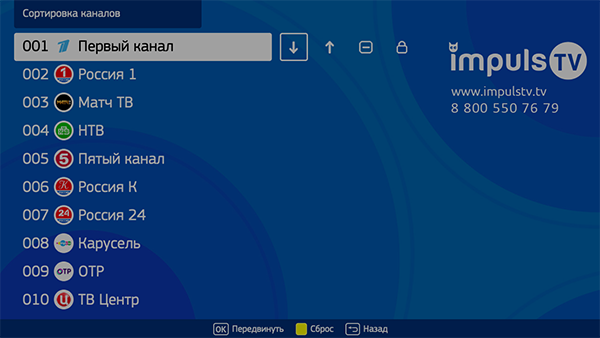
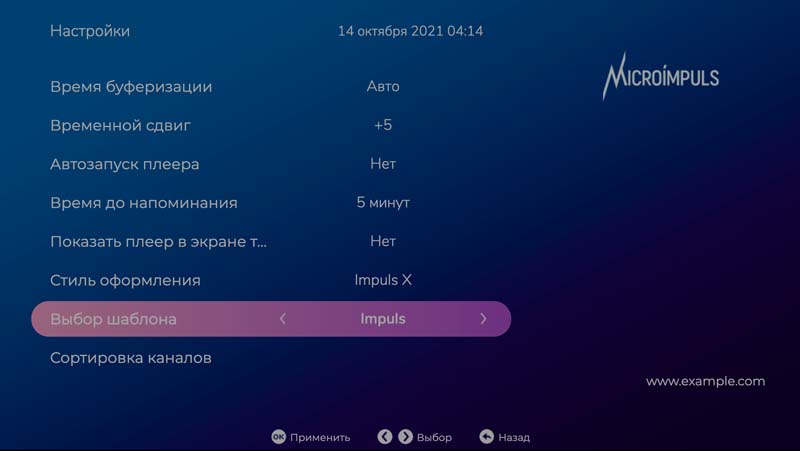
Possibility of self-sorting channels
Option name: show_sort_screen, data type: bool.
Possible values:
- true In the settings screen, the channel sorting menu will be displayed, with which the subscriber will be able to resort channels, hide unnecessary channels or block them with a PIN code (by default).
- falsely the ability to sort channels will be disabled.
Example:
var CLIENT_SETTINGS = {
///...
'show_sort_screen': true
};
Changing server channel sorting
Option name: show_server_sort_selection_settings, data type: bool.
Possible values:
- true - the settings screen will display the menu "Change sorting channels", with which the subscriber will be able to choose one of the pre-composed sorting.
- falsely - the item "Choice of channel sorting" is disabled in the "Settings" section (by default).
Example:
var CLIENT_SETTINGS = {
///...
'show_server_sort_selection_settings': true
};
Selection of the application interface used through account settings in Smarty
Option name: check_account_template, data type: bool.
Possible values:
- true - after authorization of the account, the template installed in the account settings in Smarty will be checked, and if it differs from the application used, it will be rebooted in the desired template (by default).
- falsely The set template in the account settings in Smarty will be ignored.
Example:
var CLIENT_SETTINGS = {
///...
'check_account_template': true
};
Selection of the interface used on the Settings page
Option name: show_change_template_settings, data type: bool.
Possible values:
- true – on the “Settings” page inside the application, the “Selection of a template” item will be displayed. The list of templates for selection will be formed from the array prescribed in the option
available_templates. - falsely - the item "Select the template" on the settings page will be hidden (by default).
Example:
var CLIENT_SETTINGS = {
///...
-show_change_template_settings': true
};
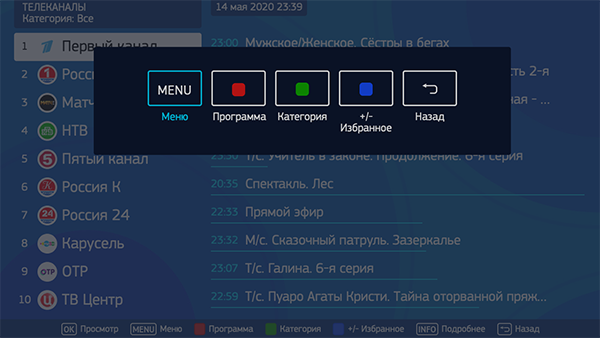
Displaying the screen menu with remote buttons
Option name: show_help_button_panel, data type: bool.
Possible values:
- true The screen menu will be displayed (called when the OK button is pressed) (by default).
- falsely - disconnected.
A screen menu may be necessary for remotes with a stripped-down set of buttons.
Example:
var CLIENT_SETTINGS = {
///...
'show_help_button_panel': true
};
Reproduction of content
Rewinding the archive by re-querying the position
Option name: server_rewind_mode, data type: bool.
Possible values:
- true - for rewinding will be used positioning by specifying the time stamp. The URL to the thread will be re-requested from the server at each rewind (by default).
- falsely fast-forward through the stream by the seek method by means of the player (does not always work correctly due to different implementations on players, but faster).
Example:
var CLIENT_SETTINGS = {
///...
'server_rewind_mode': true
};
Player rewind step
Option name: player_wind_step, data type: int.
Allows you to set the step of rewinding the player in the archive and video library mode in one click of the rewind button. The step is set in seconds, by default 30.
Example:
var CLIENT_SETTINGS = {
///...
'player_rewind_step': 30
};
Volume up/down step
Option name: volume_control_step, data type: int.
By default 5 (percentage points out of 100, where 100 is the maximum volume, 0 is the minimum).
Example:
var CLIENT_SETTINGS = {
///...
'volume_control_step': 5
};
Automatic playback of the last channel viewed at launch
Option name: auto_launch_last_view_channel, data type: bool.
Possible values:
- true play the last channel automatically when the application starts.
- falsely display the main screen (by default).
The subscriber can also influence this value by changing the “Replay Last Viewed Channel” setting in the settings menu. This option sets the default value.
Example:
var CLIENT_SETTINGS = {
///...
'auto_launch_last_viewed_channel': false
};
Setting a special ratio of screen sides when playing movies
Option name: set_default_aspect_ratio_for_vod, data type: bool.
Possible values:
- true after the inclusion of the playback of the film from the video library, the aspect ratio of 16×9 will be forcibly established.
- falsely - the aspect ratio selected earlier by the subscriber will be retained (by default).
Example:
var CLIENT_SETTINGS = {
///...
'set_default_aspect_ratio_for_vod': false
};
Automatic reproduction of the channel when moving the focus in preview mode
Option name: switch_channels_in_preview_mode, data type: bool.
Possible values:
- true when moving the focus in the list of channels, the selected channel will play automatically.
- falsely To play the channel, you need to press the OK button (by default).
Relevant when using the preview mode (option) tv_channels_list_mode meaningfully preview).
Example:
var CLIENT_SETTINGS = {
///...
'switch_channels_in_preview_mode': false
};
Configure UDP Proxy on Android devices
Option name: show_udp_proxy_settings, data type: bool.
Possible values:
- true – the settings menu will display the option “UDP Proxy”, with which you can configure the Multicast-links through UDP Proxy.
- falsely - the item will be hidden (by default).
Example:
var CLIENT_SETTINGS = {
///...
'show_udp_proxy_settings': false
};
Appearances are common
Display time of the beginning and end of the transfer in the infobar
Option name: infobar_time_display_mode, data type: string.
Allows you to change the option of displaying the time of the beginning and end of the transfer in the infobar in the archive mode or paused Live TV.
Possible values:
- by_epg time in the infobar is displayed according to the transmission program (by default).
- by_duration the start time of the transmission is set at 00:00, and the end time is set equal to the duration of the transmission.
Example:
var CLIENT_SETTINGS = {
///...
'infobar_time_display_mode': "by_epg"
};
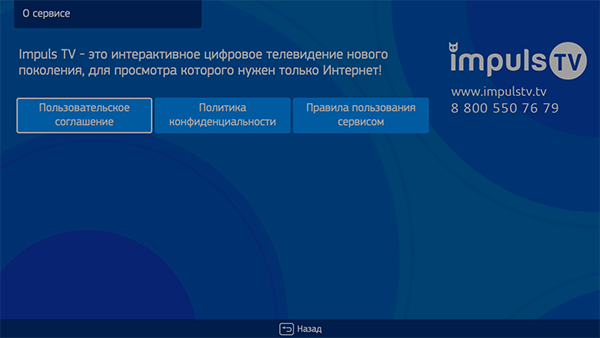
Service description text
Option name: service_description, data type: string.
A field that allows you to specify a description of the service. The impuls template is displayed on the About Service screen, which is added to the list of My Profile screen items if this field is present. This screen also displays all legal documents configured in Smarty. No default.
Example:
var CLIENT_SETTINGS = {
///...
'service_description': 'Localhost TV is the next generation of interactive digital TV!'
};
Appearance - TV
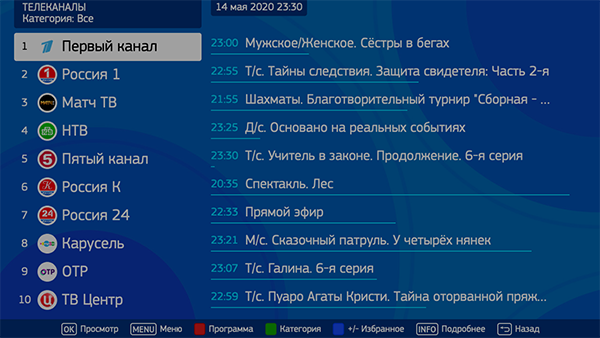
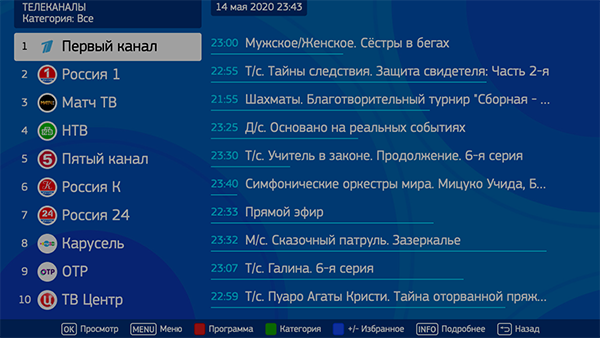
Mode of displaying the list of channels
Option name: tv_channels_list_mode, data type: string.
Possible values:
- list - the usual list (by default).
- preview - a list of channels with a preview window (player).
Example:
var CLIENT_SETTINGS = {
///...
'tv_channels_list_mode': "list"
};

Appearance - video library
Display of category "News" in the video library
Option name: vod_show_news, data type: bool.
Possible values:
- true - display the category "New" (by default).
- falsely - not display.
Example:
var CLIENT_SETTINGS = {
///...
'vod_show_news': false
};
Display of the premiere in the section "News" in the video library
Option name: show_vod_premiere_in_news, data type: bool.
Possible values:
- true - in the category "News" will display the premiere of films - those films whose premiere date is not earlier than the number of days specified by the constant TVMIDDLEWARE_VIDEO_PREMIERE_DAYS in the Smarty settings.
- falsely - in the category "News" will display the latest added movies, the date of addition to the catalog is not earlier than the number of days specified by the constant TVMIDDLEWARE_VIDEO_NEW_DAYS in the Smarty settings (default).
Example:
var CLIENT_SETTINGS = {
///...
'show_vod_premiere_in_news': false
};
How to sort movies by default
Option name: default_vod_sort_order, data type: string.
Possible values:
- - created_at - by the date of addition (first the newest) (by default).
- -kinopoisk_rating - according to the rating of Kinopoisk (first the most popular).
- -imdb_rating According to IMDB rating (first most popular).
- -year the year the film was released (the newest first).
- -premiere_date the release date of the film (the newest first).
- name by name (in alphabetical order).
Example:
var CLIENT_SETTINGS = {
///...
'default_vod_sort_order': "-created_at"
};
Grouping of films by category or genre
Option name: filter_videos_by_genres, data type: bool.
Possible values:
- true movies will be grouped by genre (by default).
- falsely Films will be grouped into categories (genres in Smarty with the option “Is a Category” enabled).
Example:
var CLIENT_SETTINGS = {
///...
'filter_videos_by_genres': true
};

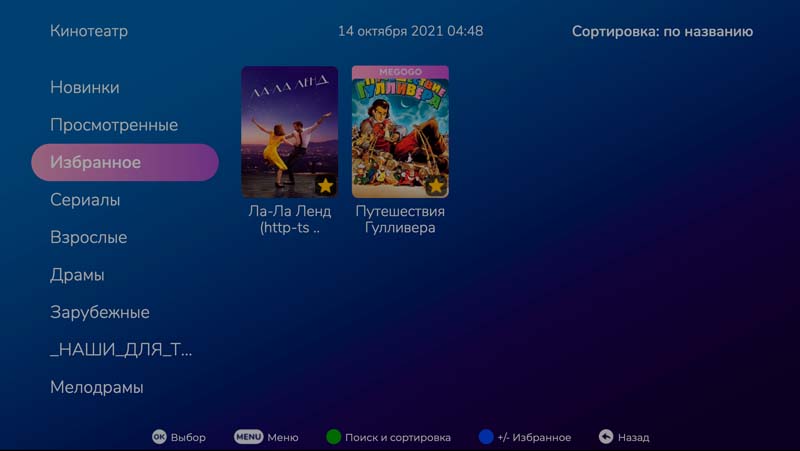
Display category "Favorites" in the video library
Option name: vod_show_favorited, data type: bool.
Possible values:
- true In the list of categories in the video library will be shown the category "Favorites" and the user has the opportunity to add movies to their favorites.
- falsely the function will be disabled (by default).
Example:
var CLIENT_SETTINGS = {
///...
'vod_show_favorited': false
};